
Setup Minimum Selling Price
Purpose
The Minimum Selling Price feature helps prevent products from being sold below the allowed minimum price. This is useful for:
- protecting profit margins
- controlling discount abuse
- maintaining price consistency
Step 1: Enable Minimum Selling Price
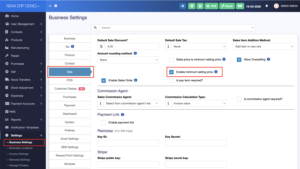
Go to: Settings → Business Settings → Sale
Then:
- locate Enable minimum selling price
- tick the checkbox
- save the settings
Navigation Path
Settings > Business Settings > Sale
Result
Once enabled, the Minimum Selling Price field will appear in the product add/edit page.
Step 2: Set Minimum Selling Price for Product
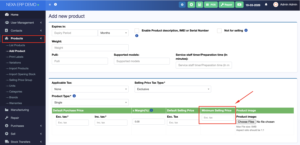
Go to: Products → Add Product or Products → Edit Product
Then:
- find the Minimum Selling Price field
- enter the minimum amount allowed for selling that product
- save the product
Navigation Path
Products > Add Product / Edit Product
Example
- Default Selling Price: 250,000.00
- Minimum Selling Price: 230,000.00
Result
The system will use this value as the lowest allowed selling price for that product.
Step 3: Check Minimum Selling Price During Sale
Go to the: Sell / POS screen and add the product to the cart.
Then:
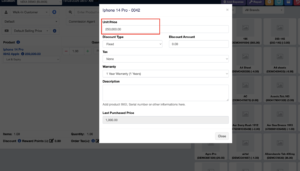
- click the product line or edit the unit price
- if the entered Unit Price is equal to or higher than the minimum selling price, the sale is allowed
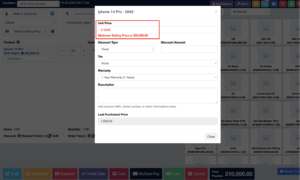
- if the entered Unit Price is lower than the minimum selling price, the system shows a warning message
Navigation Path
Sell / POS > Select Product > Edit Unit Price
Example
- Product Selling Price: 250,000.00
- Minimum Selling Price: 230,000.00
- Entered Unit Price: 210,000.00
The system displays this warning: Minimum Selling Price is 230,000.00
This means the entered price is below the allowed minimum selling price.
Still stuck? How can we help?
Last updated:
Was this article helpful to you?