Download the driver appropriate for your model and operating system (usually Windows).
Step 3: Install the Driver
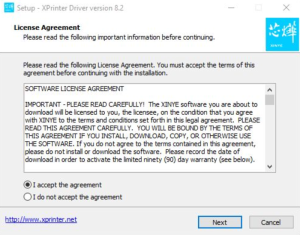
Open the downloaded file.
Follow the on-screen instructions:
Read and agree to the terms.
Click Next repeatedly to proceed through the setup.
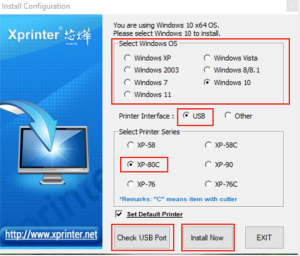
Select USB Port for Testing when prompted.
The system will auto-detect the USB port if connected properly.
Step 4: Test the Printer
After installation, do a test print to confirm everything is working.
If the test print is successful, you’re all set!
Explore
Drag
Adding {{itemName}} to cart
Added {{itemName}} to cart
Loading...
We use cookies to ensure that we give you the best experience on our website. If you continue to use this site we will assume that you are happy with it.